If you’ve followed tech over the past decade, you might have heard of “IoT devices.” But what exactly is an IoT device? The acronym stands for Internet of Things, which at first might sound a bit broad. That’s because IoT devices can encompass a wide range of things, from consumer devices like smartwatches and internet-enabled home appliances to industrial devices such as electric meters. IoT devices typically include sensors to collect data, actuators to perform actions, and a connectivity module to enable communication with other devices.
Network security cameras are a common example of IoT devices found in almost every household. In the modern era, these cameras are easy to set up, and with the right components, you can complete this project in just a few minutes. Before we begin, I’d like to thank Christian Clauss for the GitHub code used in this project. Even though the GitHub project has been discontinued since 2022, the code still runs smoothly.
For this project, all you need is a Raspberry Pi 0 W, an SD card, and a Rasp Pi camera module. The motionEyeOS GitHub page lists all the supported devices for this project if you prefer using a different Raspberry Pi or single-board computer.

First, we will flash the OS onto the SD card. Flashing is the process of copying an entire operating system (OS) onto a device’s internal memory. From the supported devices’ page, select the latest version of your device. With that file, we will use balenaEtcher to flash the image onto the SD card, which will create an OS for the Raspberry Pi.


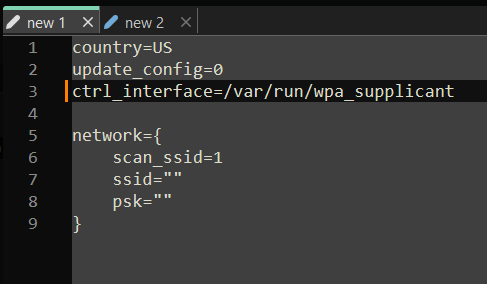
Once you’re finished flashing, open up a new text file and replicate the configuration shown in the image below. Be sure to enter the correct country code. In the field ssid=””, type your network name, and psk=””, insert your network password.
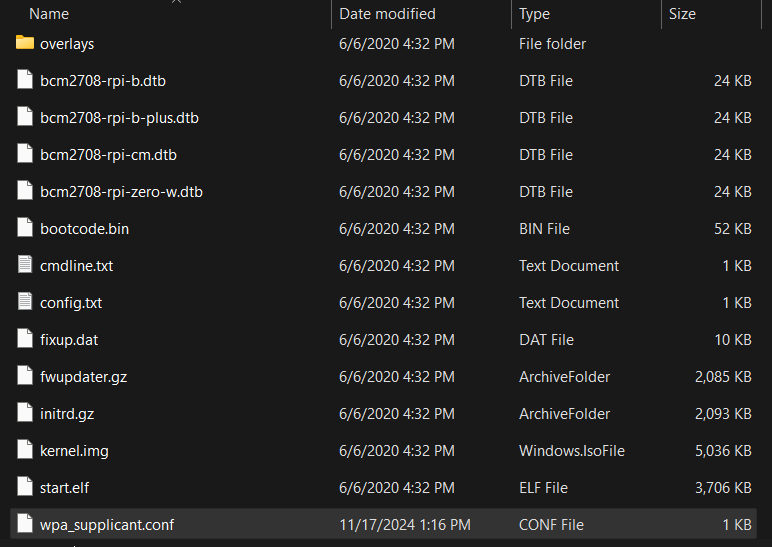
At this point, if you wish to add firewall configuration files, set a static IP for your device, or connect to the device via Bluetooth, you can find all the necessary configuration files on the GitHub page here. Once you’ve finished creating the configuration files, rename all the .txt files to .conf and copy them onto the SD card.
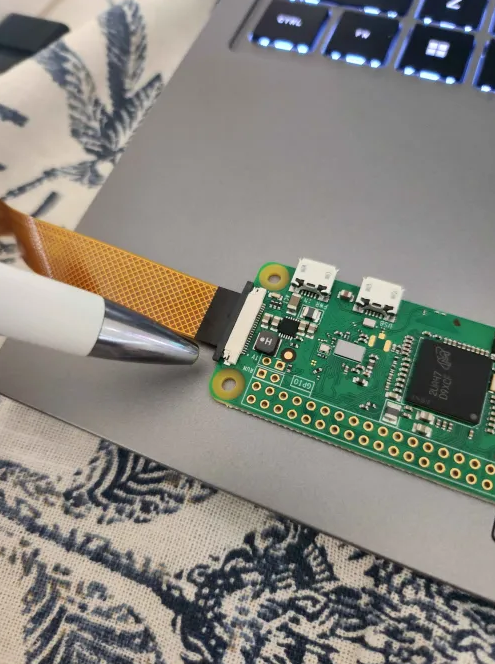
Finally, we will assemble the hardware. Begin by unfastening the black ribbon connector on the Raspberry Pi 0. To do this, gently pull the black clip away from the board. Next, insert the camera’s ribbon cable into the connector, ensuring the black side of the ribbon cable is facing upwards. Once the ribbon cable is properly aligned, push the black clip back into place to secure the connection. At this point, the ribbon cable should be securely fastened to the board and should not move.

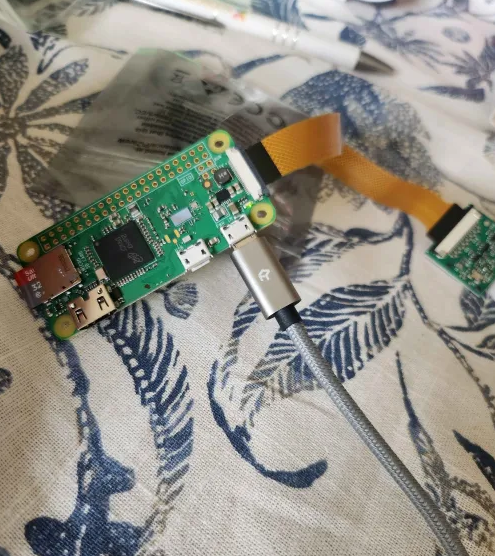
Now, insert the SD card into the Raspberry Pi board and connect the power cable. Once the board is powered on, wait a few minutes for the operating system to initialize. During this time, the board should flash green. When the camera module is activated, it will flash red.

Finally, let’s verify if the IoT security camera is functioning and connected to the network. You can do this by either using arp -a in Command Prompt (CMD) or accessing your router’s interface. Look for a new device on your network. In my case, I used arp -a to find the dynamic IP address assigned to the camera. I then entered this IP address into my browser to access the security camera’s interface.
To explain simply, ARP (Address Resolution Protocol) maps an IP address to a MAC address, which is the physical identifier of a device. By running arp -a, you can view all IP-to-MAC address mappings on your network.

By entering the IP address into a browser of your choice, on any device connected to your network, you should be able to view the live stream from your IoT device.

While you’re in the motionEyeOS interface, make sure to set a password for both the “user” and “admin” accounts. By default, motionEyeOS has “admin” or “user” as the username with no password.
To conclude this project, I want to highlight the significant risks associated with IoT devices and the common pitfalls users often encounter. IoT devices pose substantial security liabilities to any network. These vulnerabilities often stem from design flaws, poor security practices, user behavior, or a combination of all three, making them easy targets for malicious actors. For example, during our project, we discovered that the default username and password of admin and no password was all that was needed to access the admin interface.
Design flaws are particularly prevalent due to manufacturing pressures and the limited computing resources of these devices. Security and safety are frequently treated as afterthoughts rather than integral design priorities. Additionally, many IoT devices suffer from limited lifecycle support, leaving them vulnerable to exploitation as they age and fail to receive critical updates. Using readily available tools, such as the CatSniffer or a HackRF, malicious actors can exploit these technologies to gain unauthorized access to IoT devices with ease (both of which I plan to write about on this blog). In the wild, malicious actors have exploited IoT devices to create botnets, spreading malware and establishing infrastructures for their malicious activities.
A common joke about IoT is that the “S” in IoT stands for security. That being said, IoT devices are a necessary evil, and from a cybersecurity standpoint, it’s crucial to manage identities and mitigate associated risks. First and foremost, limit the attack surface. If certain IoT devices aren’t necessary, then avoid implementing them altogether. Secondly, use a tool to carefully monitor all your IoT devices simultaneously. This allows analysts, whose job is to monitor threats, to focus their time on researching threats rather than manually tracking each device. Thirdly, always segment your network to minimize the potential damage from unauthorized access. This ensures that if one IoT device is compromised, the threat is contained within a specific segment and doesn’t spread across the entire network. Finally, always update and properly secure your specific IoT devices using best practices.
For further information about securing IoT, I recommend reading OWASP and watching this NIST video.
References: Redhat, govinfosecurity, paloaltonetworks
